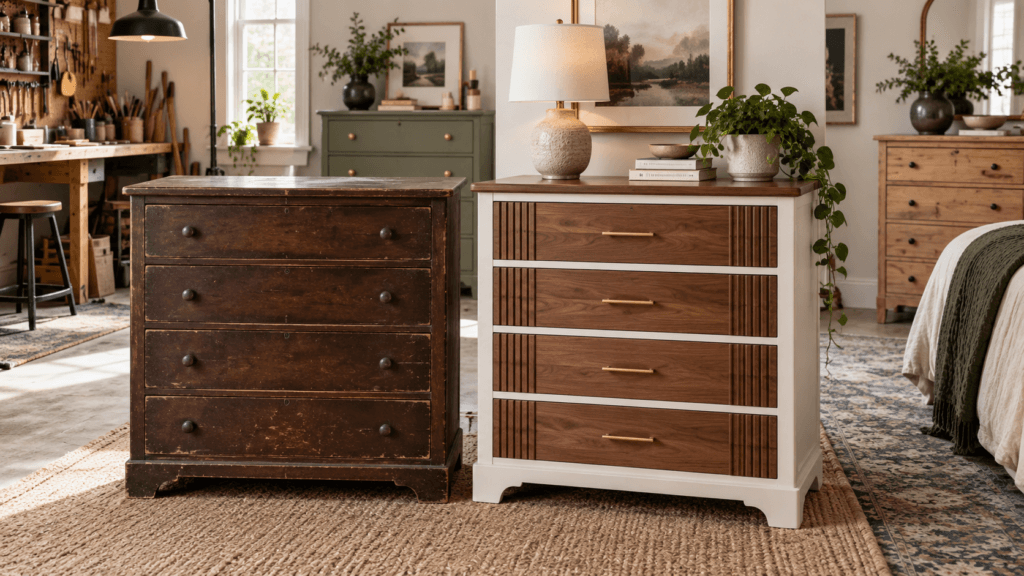
A dated dresser can become one of the most attractive pieces in a room with the right makeover. The best dresser makeover before and after ideas show how paint, stain, new hardware, repaired wood, fresh legs, trim, cane, and careful styling can completely change the look of a piece without replacing it.
Dressers are especially good makeover candidates because they are usually simple in structure and highly visible in bedrooms, entryways, guest rooms, nurseries, and living spaces. Even an inexpensive secondhand dresser can look custom when the proportions are good and the finish is planned carefully.
The most successful transformations start with the condition of the furniture. A beautiful paint color cannot fix loose joints, sticking drawers, damaged veneer, or unstable legs. Cleaning, repairing, sanding, and choosing products that suit the actual material are what separate a polished makeover from a temporary cosmetic change.
This guide shares 25 practical dresser makeover before and after ideas for modern, vintage, minimalist, farmhouse, boho, and classic interiors. It also covers tools, preparation, paint versus stain, hardware, budget planning, common mistakes, before-and-after photography, and a final checklist.
What Makes a Dresser Makeover Look Professional?
A professional dresser transformation usually depends on a few fundamentals.
Good Preparation
The dresser should be cleaned, repaired, and prepared before decorative work begins.
A Clear Finish Plan
Decide whether the final look will use:
- Paint
- Stain
- Natural wood
- Two-tone finish
- Decorative trim
- New hardware
Correct Products
Primer, paint, stain, filler, sealers, and adhesives should suit the dresser material.
Better Proportions
New legs, hardware, or trim should match the scale of the piece.
Patient Finishing
Thin coats, smooth sanding, clean edges, and adequate curing time make a visible difference.
How to Plan Dresser Makeover Before and After Ideas
Before beginning, identify what the dresser is made from.
Check for Solid Wood
Solid wood can often be sanded and refinished multiple times.
Check for Veneer
Veneer may be beautiful, but aggressive sanding can damage the thin wood surface.
Check for Laminate or MDF
These surfaces usually require different preparation than natural wood.
Inspect the Structure
Look for:
- Loose joints
- Cracked drawer boxes
- Damaged runners
- Peeling veneer
- Water stains
- Broken feet
- Missing hardware
Solve structural problems before cosmetic ones.
1. Paint a Dark Dresser Warm White

One of the most dramatic dresser makeover before and after ideas is a simple color transformation.
Before
The dresser may have:
- Dark glossy stain
- Heavy traditional hardware
- Scratched sides
- Orange or red undertones
After
Use a warm white or soft ivory finish.
Add
- Brass pulls
- Black knobs
- Natural wood top
- Simple ceramic styling
Why It Works
A lighter color reduces the visual weight of a bulky dresser.
2. Create a Cream and Natural Wood Two-Tone Dresser
Two-tone makeovers can look highly custom.
Before
A dresser may have uneven stain or damaged side panels.
After
Paint the frame cream and restore the drawer fronts.
Good Pairings
- Cream + walnut
- Ivory + oak
- Greige + medium brown wood
- White + warm natural wood
Why It Works
The natural wood grain adds depth while paint simplifies the overall shape.
3. Paint a Dresser Soft Sage Green
Sage works well in bedrooms, nurseries, guest rooms, and entryways.
Before
The dresser may feel generic or visually flat.
After
Use muted sage with simple hardware.
Pair With
- Brass
- Natural wood
- Warm white
- Black accents
Styling
Add a lamp, framed art, and one small vase.
4. Use Charcoal for a Modern Dresser Makeover
Dark paint can make a simple dresser feel more architectural.
Before
A pale or orange-toned finish may look dated.
After
Use charcoal or soft black.
Hardware Options
Try:
- Black-on-black pulls
- Brass knobs
- Bronze handles
Keep the Room Balanced
Use lighter walls, bedding, or rugs around the darker dresser.
5. Restore the Original Wood Grain
Not every dresser needs paint.
Before
A solid wood dresser may have:
- Scratches
- Water rings
- Faded finish
- Old dark stain
After
Depending on the construction:
- Clean the surface
- Remove or sand the old finish carefully
- Repair damage
- Apply an appropriate stain, oil, or clear finish
- Allow the surface to cure
Why It Works
Restored natural wood often looks timeless and expensive.
6. Refinish Only the Dresser Top
Sometimes the top needs more work than the rest of the piece.
Before
The top may be scratched while the body is still usable.
After
Restore the top and paint the lower frame.
Popular Combination
Use:
- Natural wood top
- Warm white body
- Brass hardware
Why It Works
The restored top becomes a strong design feature.
7. Replace Dated Hardware
Hardware is one of the fastest dresser makeover before and after ideas.
Before
Look for:
- Ornate pulls
- Tarnished handles
- Plastic knobs
- Mismatched hardware
After
Try:
- Slim bar pulls
- Round brass knobs
- Black cup pulls
- Wood knobs
- Bronze handles
Measure First
Check existing hole spacing before ordering replacements.
8. Reuse Original Hardware With a Better Finish
Original hardware can have character worth keeping.
Before
Hardware may look dull or tarnished.
After
Depending on the material and condition:
- Clean it
- Polish it
- Refinish it appropriately
- Reinstall it
Why It Works
Original hardware can preserve the age and personality of the dresser.
9. Add New Legs to a Boxy Dresser

Changing the base can transform proportions.
Before
A dresser sitting directly on the floor may feel bulky.
After
Add appropriately rated legs.
Options
- Tapered wood
- Rounded wood
- Slim black metal
- Short turned legs
Important
Confirm that the dresser base can safely support the new legs and expected load.
10. Add Fluted Detail to Drawer Fronts
Fluting can make a plain dresser feel custom.
Before
Flat drawers may lack texture.
After
Add narrow reeded or fluted trim where appropriate.
Finish Options
- Paint everything one color
- Keep the trim natural
- Use contrasting drawer fronts
Keep It Simple
Use the detail on the drawers rather than every surface.
11. Add Picture-Frame Trim to Drawer Fronts
Simple molding can create a more classic look.
Before
The dresser may have completely flat drawers.
After
Add thin trim around each drawer front.
Good Styles
- Traditional
- Transitional
- Cottage
- Classic modern
Paint It Together
Painting the trim and drawer front one color creates a more integrated result.
12. Add Cane to Selected Drawer Fronts
Cane can introduce texture.
Before
A dresser may feel flat and heavy.
After
Use cane-style inserts where the drawer construction allows.
Best Pairings
- Cream + cane
- Black + cane
- Sage + cane
- Natural wood + cane
Use Selectively
Too much cane can make the dresser feel overly trend-driven.
13. Create a Minimalist Greige Dresser
Minimal makeovers work well when the dresser shape is already strong.
Before
The piece may look busy because of ornate color and hardware.
After
Use:
- Mushroom
- Warm greige
- Taupe
- Soft stone
Hardware
Choose small, simple pulls.
Why It Works
A restrained palette lets proportion and shape become the focus.
14. Create a Bold Navy Dresser
A dresser can become the room’s focal point.
Before
A basic dresser may disappear visually.
After
Paint it deep navy.
Pair With
- Brass hardware
- Cream walls
- Natural wood
- White bedding
Best For
Bedrooms, guest rooms, entryways, and home offices.
15. Use Terracotta or Clay for a Warm Makeover
Earthy color works especially well in boho and warm modern interiors.
Before
A pale dresser may feel generic.
After
Use a muted terracotta or clay tone.
Pair With
- Cream
- Olive
- Walnut
- Woven baskets
- Ceramic lamps
Keep the Styling Simple
Let the dresser color carry the visual interest.
16. Convert a Dresser Into an Entryway Console
Changing function can be part of the makeover.
Before
An unused bedroom dresser may be sitting in storage.
After
Use it in the entryway.
Add
- Mirror
- Table lamp
- Tray
- Basket
- Fresh branches
Why It Works
Drawers create excellent hidden storage for keys, paperwork, bags, gloves, and accessories.
17. Turn a Small Dresser Into a Bedside Piece
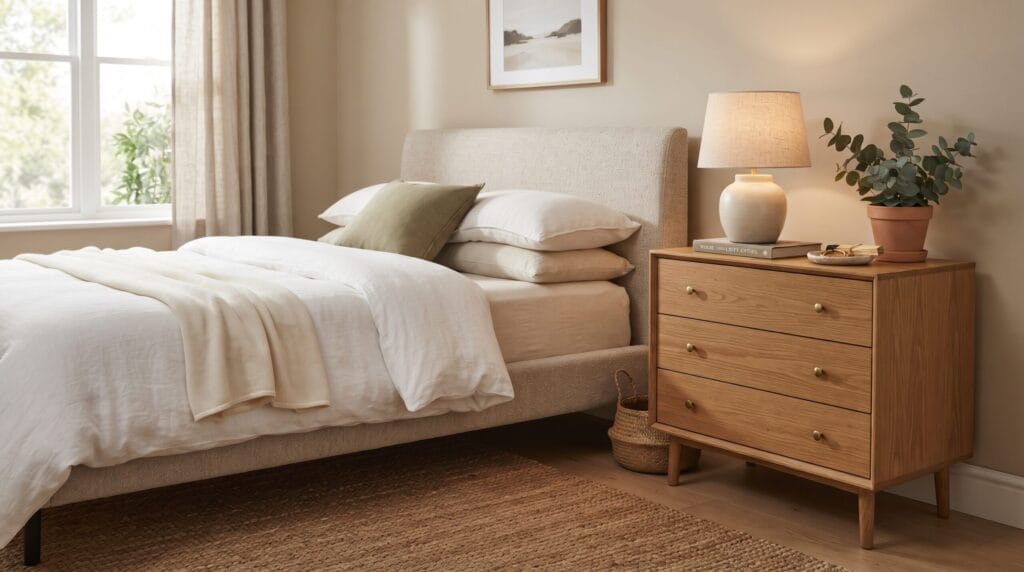
A compact dresser can replace a tiny nightstand.
Before
A standard nightstand may not provide enough storage.
After
Use a small dresser beside the bed.
Benefits
It provides:
- Larger surface
- More drawers
- Better storage
- Stronger visual balance
Scale Check
Make sure the dresser height works comfortably with the bed.
18. Refresh a Vintage Dresser Without Erasing Its Character
Some dressers should look old.
Before
A vintage piece may show:
- Patina
- Small scratches
- Worn edges
- Original hardware
After
Clean and repair while preserving useful character.
Consider
- Gentle cleaning
- Minor wood repair
- Hardware polishing
- Appropriate wax or protective finish
Why It Works
Age can be part of the beauty.
19. Line the Drawers for a Hidden Before-and-After Detail
Drawer interiors can be part of the transformation.
Before
Interior surfaces may look scratched or stained.
After
Use:
- Removable wallpaper
- Decorative paper
- Fabric liner
- Protective drawer liner
Color Direction
Choose a pattern that connects to the dresser color.
Why It Works
The makeover feels complete even when the drawers are opened.
20. Paint the Drawer Interiors a Contrasting Color
A small hidden detail can add personality.
Before
The inside may be plain or unfinished.
After
Use a coordinating color.
Examples
- Cream dresser + sage interior
- Navy dresser + pale blue interior
- Charcoal dresser + warm beige interior
Keep It Practical
Choose a finish suitable for the surface and expected wear.
21. Add a Decorative Back or Side Detail
Not every makeover needs to focus on the front.
Try
- Painted side panels
- Simple stencil used sparingly
- Textured wallpaper panel
- Wood trim
Best Use
This works well when the dresser is visible from the side.
Keep It Subtle
The front should remain the visual anchor.
22. Make a Thrifted Dresser Look More Expensive
Secondhand dressers can be excellent makeover projects.
Look For
- Strong drawer boxes
- Solid construction
- Good proportions
- Useful dimensions
- Interesting legs or hardware
Ignore
- Scratches
- Old stain
- Minor cosmetic damage
Avoid
Major structural failure unless you have the skills to repair it safely.
23. Create a Budget Dresser Makeover Under $100
A dramatic transformation does not always require many materials.
Prioritize
- Cleaning
- Sandpaper
- Primer where needed
- Paint
- Hardware
- Small repair supplies
Save Money By
- Reusing hardware
- Shopping secondhand
- Using leftover paint when appropriate
- Keeping the existing top if it is in good condition
Biggest Impact
Color and hardware often create the strongest visible change.
24. Style the Finished Dresser With Restraint
Styling is part of the after photo.
Simple Formula
Use:
- Lamp
- Artwork or mirror
- Small vase
- Tray
- One book or object
Leave Space
Do not cover the entire top.
Why It Works
The dresser should remain the focus.
25. Photograph the Dresser Before and After Properly
The final of these dresser makeover before and after ideas is presentation.
Before Photo
Use:
- Natural daylight
- Clear background
- Straight-on angle
- Minimal styling
After Photo
Use the same:
- Camera position
- Distance
- Lighting direction
- Crop
Add Detail Shots
Photograph:
- New hardware
- Restored wood grain
- Drawer lining
- Fluted trim
- Legs
- Paint finish
Why It Works
Consistent before-and-after photography makes the transformation easier to understand.
Dresser Makeover Before and After Ideas by Style
| Style | Best Finish | Hardware | Best Accent |
| Modern | Greige, black, natural wood | Slim bar pulls | Large mirror |
| Scandinavian | Warm white, pale wood | Small wood or black knobs | Ceramic lamp |
| Boho | Terracotta, sage, natural wood | Brass or wood | Woven basket |
| Traditional | Cream, navy, walnut | Brass or bronze | Framed artwork |
| Farmhouse | Warm white, medium wood | Black cup pulls | Stoneware |
| Minimalist | Mushroom, taupe, charcoal | Small simple pulls | One sculptural object |
Dresser Makeover Budget Guide
| Budget | Best Projects | Typical Materials |
| Under $25 | Cleaning, drawer liner, hardware reuse | Cleaner, paper, polish |
| $25-$75 | Paint and new knobs | Paint, primer, hardware |
| $75-$150 | Two-tone makeover | Paint, stain, pulls, repairs |
| $150-$300 | Trim, cane, new legs | Decorative materials, hardware |
| $300+ | Major restoration | Professional repair or refinishing |
Costs vary by dresser size, material, condition, tools already owned, and local labor rates.
Paint vs Stain vs Natural Wood for a Dresser Makeover
| Finish | Best For | Main Advantage | Main Limitation |
| Paint | Dated or mixed surfaces | Major visual change | Hides wood grain |
| Stain | Good natural wood | Enhances grain | Needs suitable wood surface |
| Clear finish | Attractive restored wood | Preserves natural character | Preparation must be careful |
| Two-tone | Mixed-condition dressers | Custom contrast | Requires planning |
| Decorative trim | Plain dresser fronts | Adds dimension | Can become trend-heavy |
Basic Dresser Makeover Tool Checklist
Depending on the project, useful tools may include:
- Screwdrivers
- Measuring tape
- Sandpaper
- Sanding block
- Cleaning cloths
- Suitable cleaner
- Wood filler where appropriate
- Paintbrush
- Small roller
- Drop cloth
- Primer
- Paint or stain
- Protective finish
- Replacement hardware
- Drill where needed
- Protective equipment
Always follow product instructions for coatings, adhesives, tools, ventilation, drying, and curing.
How to Make a Dresser Makeover Look More Expensive
Improve the Hardware
Correctly scaled hardware makes a major difference.
Preserve Good Wood
Do not cover attractive grain automatically.
Use Fewer Finishes
One paint color plus one wood tone is often enough.
Repair Drawer Alignment
Even beautiful paint looks less polished when drawers sit unevenly.
Use Thin Coats
Heavy paint can create visible texture and drips.
Let the Finish Cure
Avoid placing heavy decor on the top too quickly.
Style With Larger Objects
One substantial lamp and artwork usually look more refined than many tiny accessories.
Dresser Makeover Before and After Ideas for Renters
Dressers are ideal renter projects because the furniture is portable.
Good Changes
- Paint
- Hardware
- Drawer liner
- New legs
- Refinishing
- Decorative trim
Portable Value
A well-made dresser can move to another home.
Measure Access
Make sure the dresser can fit through doorways, stairs, and future layouts.
Common Dresser Makeover Mistakes
Painting Without Cleaning
Dust, polish, oil, and residue can affect adhesion.
Sanding Veneer Too Aggressively
Thin veneer can be damaged quickly.
Skipping Repairs
Loose drawers and unstable legs should be fixed before finishing.
Choosing Hardware Without Measuring
Existing screw holes may not match new pulls.
Applying Thick Paint
Thin coats usually produce a smoother finish.
Using the Wrong Primer
Material type affects preparation.
Rushing Drying and Curing
A surface may feel dry before it is ready for heavy use.
Overdecorating the Finished Dresser
Too many accessories can hide the makeover itself.
Dresser Makeover Before and After Ideas Checklist
Use this dresser makeover before and after ideas checklist:
- The dresser is structurally sound.
- Material type has been identified.
- Drawers open and close correctly.
- Hardware measurements are recorded.
- The dresser is thoroughly cleaned.
- Repairs are completed before painting.
- Veneer is handled carefully.
- The final color suits the room.
- Natural wood is preserved where appropriate.
- Primer suits the surface.
- Thin finish coats are used.
- Decorative trim is properly attached.
- New legs are safely supported.
- Hardware is correctly scaled.
- Drawer interiors are clean.
- Drying and curing times are respected.
- The top remains functional.
- Styling does not overcrowd the dresser.
- Before and after photos use similar angles.
- The final makeover improves both appearance and function.
Frequently Asked Questions
What Are the Easiest Dresser Makeover Before and After Ideas for Beginners?
Start with deep cleaning, new hardware, drawer liner, or a simple painted finish in warm white, greige, sage, or charcoal.
Should I Paint or Refinish a Wood Dresser?
If the wood grain is attractive and the surface can be restored safely, refinishing may be worth considering. Paint works well when the surface is damaged, mixed, or visually dated.
How Do I Make an Old Dresser Look Modern?
Use a cleaner color palette, simpler hardware, repaired drawer alignment, restored wood, new legs where appropriate, and restrained styling.
What Colors Work Best for Dresser Makeovers?
Warm white, cream, sage, greige, mushroom, charcoal, navy, terracotta, and natural wood finishes are versatile options.
How Can I Make a Dresser Makeover Look Expensive?
Improve hardware scale, preserve good wood grain, repair defects, use thin finish coats, coordinate colors, and style the finished top with only a few larger objects.
Can I Make Over a Laminate Dresser?
Yes, but laminate requires suitable cleaning, preparation, primer, and paint products. Follow product directions designed for nonporous surfaces.
Are Before-and-After Photos Important?
Yes. Matching angles, lighting, distance, and crop make the improvement easier to see and provide better documentation of the project.
Conclusion
The best dresser makeover before and after ideas show how an ordinary or dated dresser can become a distinctive piece through thoughtful repair, color, wood restoration, hardware, and finishing.
Start by identifying the material and checking the structure. Fix loose joints, damaged drawers, peeling veneer, and unstable legs before making cosmetic changes. Then decide whether paint, stain, natural wood, or a two-tone finish best suits the piece.
Warm white, sage, greige, charcoal, navy, terracotta, restored wood, fluted details, cane, trim, new legs, and updated hardware can all create strong transformations when used carefully.
Most importantly, avoid rushing the preparation and finishing stages. Good cleaning, smooth repair work, correct products, thin coats, and adequate curing time are what make the final result look professional.
With the right plan, a secondhand or forgotten dresser can become one of the most useful and attractive pieces in your home.
Also Read: “15 Luxury Bedroom Makeover Ideas for an Elegant New Look“